Monday, December 12, 2011

There's Always Option B

I have been doing some serious window shopping on the web. Not that I can afford anything right now (my pockets are feeling very light ever since renovations started.) What I have found though, is that nearly everything has an option B (except for that pesky Jenny Lind bed...more on that here.) Here are just a handful of examples on how you can easily find a cheaper version of anything.


Overstock - $227


Walmart - $129


This is the bed I mentioned in a previous post. Exact same bed, nearly a $100 difference!

Restoration Hardware - $2095


Home Decorators - $469


I love Restoration Hardware, but all their stuff is so darn expensive! While browsing for a bathroom vanity for the master bath, I found a very similar vanity at Home Decorator's for almost $1500 less! It even has an extra shelf. I am not digging this for me, but it's a great bargain regardless!

Crate and Barrel - $1659

Home Decorators - $799

Love the juxtaposition of the reclaimed wood and the metal legs! Loving that the Home Decorators dining table is half the price.


Room and Board - $424
Overstock - $145.53


What a deal. At Room and Board, you can get your hands on just one of these classic white Eames chair for $424, or you can head on over to Overstock and pick up two of them for $145. I actually have these chairs and I can attest that they are great quality chairs.

Room and Board - $799
Walmart - $159


Here's the bed I featured in my mood board for the bedroom. I found the same exact Parsons style bed al Walmart. for way cheaper. 

Madeline Weinrib - $1000
Overstock - $155


I have been coveting the Madeline Weinrib zig zag rug for years. But I am just too cheap to drop a G on a rug. I am totally planning on getting the Alexa Chevron rug though, either for my room, or the kids. 

Room and Board - $440
Home Decorators - $129


Love the metal chair, hate the price tag. In comes Home Decorators, yet again, knocking off a few hundred dollars from the price tag.

You do have to be careful about the quality, but in situations like the white twin bed, it's a no brainer!

Sunday, December 11, 2011

All in a Days Work


Actually, its more like two days work. We've been busy getting the hardwood floors down and thank goodness for some much needed family reinforcements! 


The in-laws came down and did some hard labor, while my parents were on kid duty. We really couldn't have knocked out the floors without everyone's help!

It started out with a lot of prep work. That means cleaning up, grinding high spots, leveling low spots, and laying down under-layment. This red, bubbly plastic allows for ventilation under the floors to keep moisture from getting trapped and morphing, or damaging, the floors.


After the prep work, we moved on to the fun stuff! Everyone had a job, Micah's pops lay down the floor, Micah cut, and Linda handed over pieces, and searched for proper sizes. Me? Honestly, I was on painting duty. More on that on a later day.

As soon as the floors started being put down I literally did a happy dance. I just couldn't contain myself. 


For the most part, it wasn't too difficult. The most challenging part was cutting the floors perfectly to fit. 


We used spacers where the floor meets the wall to allow the floor to expand and contract. My father-in-law had to screw the suckers in because they kept popping out!


And now, the final result.....


Gorgeous, right? I can't wait to get the baseboard on. Thanks you to all that helped!!! We couldn't have done it without you. I'll be back soon to share pictures of the other rooms.


Saturday, December 10, 2011

Feeling Blue...

You may or may not remember from this post that I had planned on doing a gray and yellow color scheme for the master. I had planned on painting the room a deep gray, and my inspiration was this:


Well, Micah and I had decided on a color after we swatched a few on the wall:


The color that we chose is Heavy Goose, by Martha Stewart, and it's the the color in the middle, all the way to left. We tried to take into consideration that the room is small and wanted to avoid anything too dark.

So again, we gathered reinforcements, and were on our merry way.


Seeing the color on the wall, we knew we had made the right choice...that is, until we came back the next day. During the day, it appears much more blue than gray. Which is weird, because we looked at the swatches in both daylight and at night. The only thing I can think of, is that against all the other colors, Heavy Goose appeared more gray.


It's so hard to get an accurate shot of color through a camera. Here is one with a contrast:


In these pictures, it looks more gray! Regardless, we still love it! We just need to re-think the bedroom color scheme. I hate when I am dead set on an idea and then have to change it. I am notoriously indecisive, and it really does take me an annoyingly long time to commit to anything.  


Here are some more inspirations:


This shot still has some yellow thrown in the mix, but the rest of the room is quite subtle. Knowing how the camera play tricks with color, this looks very similar to the color we have going on in the room.


You can see that the above wall color definitely has blue undertones. For the most part, they have a monochromatic color scheme going on and the can get away with it because the walls exude two colors, blue and gray.


 Love, love, love this! And I would bet money that the wall color is the exact same color as mine. Pops of yellows, oranges and reds, balanced with neutrals, makes this room stand out. I just adore all the silhouettes!!!


We've been busy laying down the wood floors and I promise to update every one soon!


Monday, December 5, 2011

Twin Bed Dilemma

My head is all over the place with this house. One minute I am planning the master, the next I am thinking  of the kids' room. The little guys will still be sharing a room, which quite frankly, is the way they want it. They love being together, it's freakin' adorable. 

So, they are currently bunking it with this baby:


We originally were worried that Romes would roll off a bed, so this was the best option considering her mattress is on the floor. Its worked out great for them, but now that their bedroom is expanding, I would really like to have them in side-be-side twin beds so they can see each other while they chat at night. 


If I had it in my budget, I would instantly scoop up two of these spindle beds from Land of Nod:


I have a very unhealthy obsession with this bed! Its a lil' throwback to 19th century Sweden, but it comes with a hefty price tag...well for me. I just can't bring myself to spend $500 on one bed, and if you can't do the math, that's a grand for both! 


So I started to scour the internet for a Jenny Lind bed knock-off and came up short! Totally sucks! So I moved on to search for just a nice, white, twin bed, and that proved to be difficult too! Who knew there was a shortage of cute, affordable, twin beds?


Here are some of my options. First up is a shaker style bed, which comes from Walmart, and is priced at $168. It actually goes with the style of the finishes in our house, awesome. However, I am not sure if it will look cheap upon arrival. I found this exact same bed on Overstock for $240 so this is definitely a bargain.


Next up is another bed I found at Walmart. This one is metal, and does have similar lines to the Jenny Lind, but I just don't know if I can get in to the whole metal thing. Priced reasonably at $160,


Lastly, I could go the IKEA route. I found this bed for a mere $40. Now that's a deal! It's made out of real wood. Its not white, but because its unfinished I could paint it any color I want.


So seriously, what do you all think? Knowing that I dream of the Jenny Lind bed, which option should I go with? Anyone know of anywhere else I can go to check out some affordable twin bed options? I can't believe I am having such a hard time finding a cute, white one! Crazy!

We Survived Phase One

Seriously, to say we worked our butts off this weekend is an understatement! Working hard paid off. We got down and dirty, literally, and primed all the walls and ceiling, and even got around to painting the entire ceiling! Here's a little after shot of us:

  
No, that isn't a clown, its Micah. I promise I am covered in paint as well, just not right up in my face. I was on rolling duty.


We started early Saturday and got done late Sunday night....sadly, that's just priming the walls. The real color hasn't even gone up yet! We did manage to paint all the ceilings though. At first I was not so keen on the idea, but as the white paint went up, I realized how yellow the ceilings were. The white instantly brightened the rooms!

It took us a few good hours to prep the entire house. That means covering all the floors and all the windows and doors. After about 4 hours, we had something that looked like this:


Every single ounce of floor had to be covered, as well as every opening, and anything else that was laying around. We primed all day Saturday, and Sunday, half drunk from exhaustion, we decided to rent an airless spray tank.


After watching a few YouTube tutorials (thank goodness for YouTube) we felt we were ready to go. Micah decided to take on the spray action and I was right behind him pointing out spots he missed, as well as going over saturated areas with a rolling brush. 

Of course, we took necessary precautions.


It took a little getting used to, but man, are we glad we invested the money! We were able to knock out two coats, of the whole ceiling, in a few hours. It would of taken two days with rollers!

By the second coat, Micah had a cute little prance he was doing. I wish I would have gotten it on video!


We were so confident by the time we finished, we even primed the last room using the sprayer! Now, we are planning on using the good old fashioned roller to apply the final color, but this was an overall great experience.

The current challenge we are facing is choosing a paint color for the main living areas! We have been through 21 samples and still can't agree on one! Micah is leaning towards something beige and I would like something in the cooler family, like a pale, pale gray- blue, something that appears white, until you lean it up against something that actually is white. Here are the first few we tried:


The good news is that we did agree on a bedroom color! It's one of these, and we are painting it tomorrow!


Can't wait to share the final bedroom with everyone!

Saturday, December 3, 2011

About Those Floors...

Things are moving along in this ol' shack! We're hoping to move within the next two weeks! We've ripped up the existing floors, have already laid down the tile throughout the house (pictures later, its covered up) and plan on tackling the hardwood in the bedrooms this weekend. 


Here's a shot of the floors when we first purchased the house:


And here's a shot of the floor in the hallway:


A lot of people were wondering why we were getting rid of marble floors? Well, first, they just weren't our style. We didn't dig the pattern they created nor did we dig the sheen. At certain parts of the day, like early morning, the floors looked bright, but for the most part, they were really dark and heavy. Also, the floors had these imperfections that drove me crazy, as you can see here:


So, away went the floors! And let me tell you, when they left, we hit the floor goldmine! Underneath it all was this:


Travertine! Why would travertine make us so excited? It's a very flat, and leveled floor that makes laying down anything much easier! Yay!

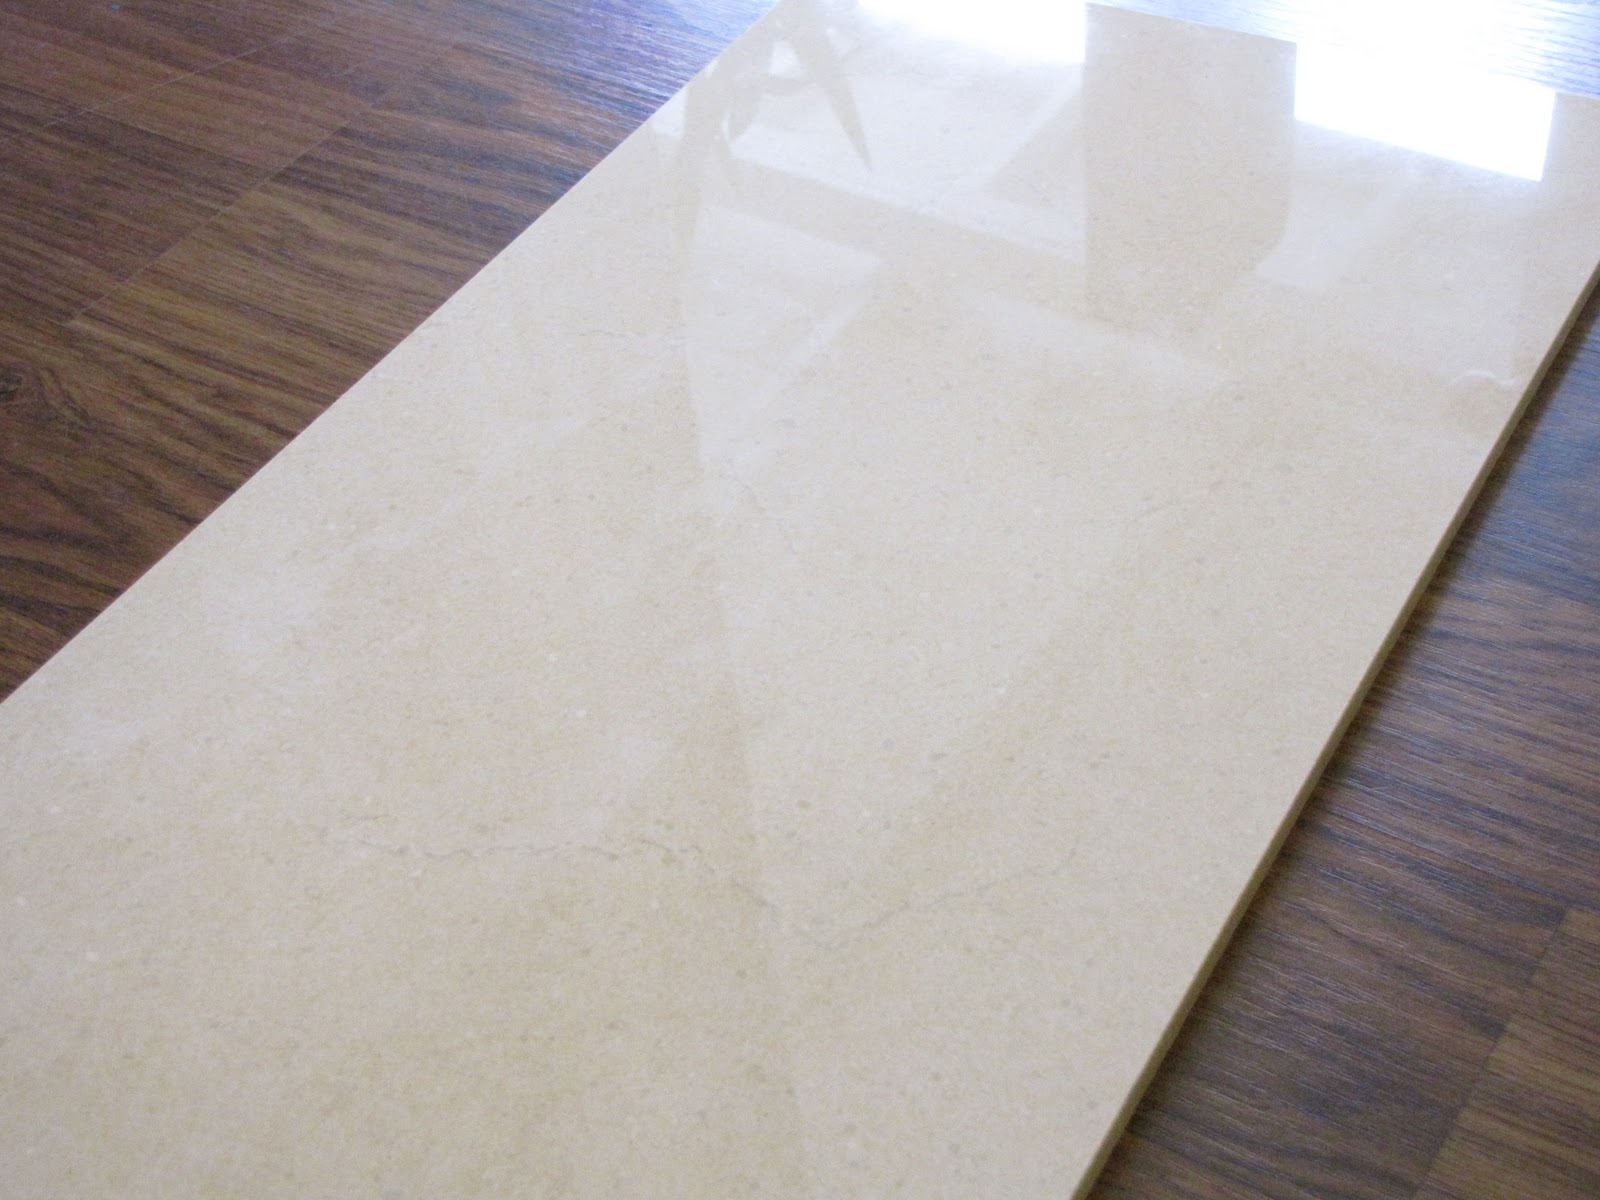
So what's going down???? Throughout the house we installed porcelain tiles that mimic marbleThe color we chose was Crema Marfil, which is the exact tile in my parent's house (thanks mom!) The tiles had to be installed by professionals as the grout line is very thin, 1/16 of an inch! Here's a shot of the sample tile we brought home:


And here's a shot at an angle, so you can see how nice and shiny it is!


The tile we installed, is 24" x 24", not the size of the above sample.

As for the bedrooms, we are laying down hardwood floors this weekend! The color is called Cognac and each plank is 4.25" thick. Here are two samples interlocked:


As much as laminate has come a long way, I have always dreamed of having hard wood! Well, for now, all I have are sample shots to tease you with! As soon as we are done, I promise to share more shots with everyone!