Sunday, January 29, 2012

Bedroom Closet

Band: She & Him (AKA - Zoey Deschanel's band) Song: "Why Do You Let Me Stay Here?"


It pains me to admit this, but for the past 34 days, my living room has looked like this:


Embarrassing, I know. But I am just trying to keep it real people. The reason for this, is that we didn't have our closet done. Up till now, it was just a hole, in a wall. So to the drawing board we went, to design our custom closet. 


Thank goodness Micah studied engineering in college, because my math-impaired self could have never figured all this out.


So with this in mind, we got our supplies, which consisted of lots of 3/4" sanded plywood, which we ripped to our specific dimensions, and MDF. 


Before we started, we made sure to cut out a small portion from the bottom-back of the plywood to accomodate our baseboard. We are going for a built-in look afterall.


As you can see, we made good use out of our Kreg Jig. This made the project so much easier!


After drilling all our pocket holes b, we started to assemble the closet.


We plan on building a face, to create the illusion that this is one seamless piece, which is why we doubled up on the wood:


And this is what we've got so far:
 

Two towers. See that big open space on the bottom? That's where our drawers will go. We've been working hard at getting them done this weekend. Promise to update everyone as soon as we are through!

Saturday, January 28, 2012

Ikea Hack is Done!

Song of the day: "Black Dirt" by Sea Wolf


In case you missed it, the journey started here. Billy's makeover is finally complete, but before you feast your eyes, please know, I put everything on the shelf pretty half-hazardly, and this is definetly not the final look.


After chopping Billy practically in half on a 33 degree angle, he got primed and painted in a semi-gloss white; the same white as all the trim in our house. 


Before painting the inside, I used wood putty to cover all the shelf holes that most Ikea bookshelves come with. I left three holes to give me some wiggle room as far as shelf height.


All in all,  I am pretty happy with it. I really wanted to paint the back, but the boss man (A.K.A. Cayden) trumped that idea. I will say, I am still considering painting the whole thing a different color. Right now, it is too white for me, but I think that's because the bedding is still white, so I am holding off for now. 

Wednesday, January 25, 2012

Ikea Hack in Progress

I'm toolin' people! And I can't wait to finish my next project!


Confession: We are still living in boxes. It's been 30 days and we are still not completely unpacked. With the hall closet behind us, we have started focusing on the built-ins in the master closet. Once that's done, the house should be in order. 

However, even though the kids' closet has been done for a while, their room is still a train wreck too. The only one to blame is me. I have been so indecisive over what to do with their book shelves. When we moved, I just thought they were too big for the room, so after 30 days of thinking, and thinking, and thinking, I decided it was time to hack them up!

Here is what I am working with:


Ikea's Billy bookshelf. Purchased nearly three years ago for a mere $80. I didn't want something quite so big in the room, so to the internet I went. After searching for quite some time, I found these, from Land of Nod:

 
Billy boy is having a makeover! First up, was to strip him down to his bareness. I know, it sounds so dirty. Also, excuse the grass, or lack there of. The exterior of our home probably makes our neighbors believe scary people live here.


I then decided on the height I was going for, and drew a line about six and a half inches below this point. I was not looking for a straight cut, so this line was actually going to be the top shelf, and then I planned on cutting the sides at an angle.


With the miter saw set to cut at a 33 degree angle, away I cut.

 
Billy comes with a nice little feature. The bottom of the book shelf had a cutout to accommodate a three and a quarter baseboard. This wasn't going to cut it, as our baseboards are six inches wide. So I enlisted Micah, who used a hand saw to take a nip off.


And sadly, that's all I've got for you. I'm in the middle of priming and painting, and should have it complete by this weekend! I am considering painting the back a fun color, other than boring white, but Micah isn't feeling it. Here's what I'm thinking:


I love it, but I just don't think I can get Micah on board. What do you all think?

Sunday, January 22, 2012

Progess: Hall Closet

I recently discovered Of Monsters and Men, and all I can say is how sad it is that their album only has four songs. This song, "Little Talks," was on repeat on several nights while working on this project.


Here's what I've learned about being a DIYer...things take A LOT longer than you think! Take the hall closet that we have been working on. After drawing it out on paper, and seeing what a simple design it was, I really figured it would be a weekend project. It seemed so easy: a few pieces of wood, some straight cuts, a little paint, and some screws. Wrong. The process is tedious. Case in point, measuring. Measurements are usually a little off, which requires extra cuts. Also, paint, there is a significant amount of wait time between coats. Don't get me started on wood putty! All those nails and nicks need to be concealed, and wood putty needs to dry, not to mention be sanded down and then painted over twice. 

I really wanted to write this post once the closet was all done, but it's been so long, I wanted to give everyone an update. It's 90% complete, so that's not too bad.

Here's the closet we are talking about. This is an early shot, before floors or paint. We actually built this closet by moving the hallway wall up two feet in to the living room. 


Here's an after shot. No trim or doors yet! We wanted to wait to install those till after we were done with the built-ins.


Keeping in line with the rest of the wood in our house, we painted some 1x2s in a glossy white...


And cut them to size. These babies will hold the shelves in the closet...
 

Next up, a very important step, was measuring the distance between each shelf and using a level to draw out where we were going to attach the 1x2s....


We used a nail gun and then concealed the nails with wood putty, which we then let dry and sanded down...


After all that, here is what we've got...


It wasn't until after we attached all the 1x2s that we got our Kreg Jig (read about it here,) but thankfully our kit came with a portable jig, so we used it to create pocket holes at the ends of the 1x2s that are along the wall...


We then used the pocket holes to attach a 16 foot wide piece of plywoodEssentially, we created a wall at the center of the closet. The reason the shelves do not extend all the way is because for one, the closet is almost 10 feet wide, and these babies would dip, and secondly, since this is a custom closet, we decided that we didn't want shelves on both sides. We needed space to hang some coats and room for the vacuum, ironing board, and so on.


Again, we attached 1x2s to support the shelves...


Lastly, we added the shelves. The first three rows of shelves are also made of 16 foot wide pieces of plywood which Home Depot, or Loews, do not carry. We had to by from a specialty lumber yard.


On the other side, we set up the closet a little bit different to accommodate some coats, wet suits, and dresses.


Lastly it was time to caulk and paint. It is amazing what a difference caulking makes! Take these before and after shots:


We also used Floetrol when we painted. An ingenious solution to brush strokes and roller marks. It's a conditioner for paint that allows it to dry nice and smooth. Perfect for closets or cabinets.


When all was said and done, it took us three weeks to complete, but it was worth it. We have more than enough space to store all our junk.


The above picture is our linen closet, as well as a storage place for our boat supplies and anything else that finds it way in here. I am not too worried,  I'm sure we will fill it up. 

Still no baseboard or trim on the walls....soon, very soon. It just bugs me looking at this picture on not having those installed!


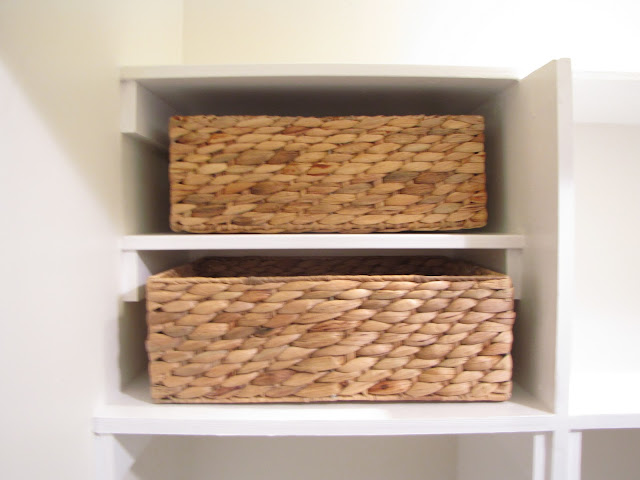
On the other side, we have space for coats on the right (we haven't hung the chrome rod yet) and on the left we made room for an ironing board, a vacuum and a broom. Above that are baskets for, well, junk, and of course more shelving! 

We are in the midst of tackling our bedroom closets! Update soon. 

P.S.- How awesome was that song? Did you want to dance around as much as I did?


Saturday, January 21, 2012

Kids' Storage

Before we begin, some music for your ears. My good friend sends out his top songs of each year, and this was one from 2011. The song is "Sparrows," by Matt Pond PA.


I've been perusing the web, trying to get ideas on what to do with all the kids' "stuff." Between books, toys, and Cayden's beloved Legos, we are in serious need of some storage space. Before we moved, the kids had two of these...


Good ol' Billy (from Ikea.) Theirs had doors on the bottom to conceal the mess that you know kids can make! When we moved, we put these in the kids' room, but I just wasn't feeling it. So off to the web I went for inspiration ideas.


How can you go wrong with Ikea's Expedit system? And for only $200! I love that even though this baby is huge, there is still room on top to add decorative items. FYI, I will be adding a map in the kids' room! Love that idea. I purchased this one from Urban Outfitters:


Alright, so here's another great idea:


Before I even get started with the storage solution, how freakin' awesome is that chalkboard wall? Wonder if it's messy? Anyone have experience with paint-able chalkboard, I would love to know. I am considering opting for floating shelves as pictured above along one of the walls in the kid' room. I am also digging the low narrow shelf. I like that it has two puroses: 1. storage and 2. table top. I am pretty sure that this is Expedit too.

iVillage

Anything look familiar with the above photo? Yup, floating shelves and a long narrow storage unit. If this isn't Ikea's Besta system, than its a really close look.


Design Mom


Again, low storage, allowing for some decorative items, and I high shelf. I really like how there is multi-levels of surface space.

iVillage

First off, that bed rocks, secondly, I love the idea of a little bookshelf at the front of the bed!

Domino Magazine

The above photo is my ALL TIME FAVORITE kids room. Yes, I capitalized it! I saw this back in 2008 in Domino Magazine (RIP) and have loved it ever since. A little secret: it is my biggest inspiration for the kids' room. As for storage, I love the basket and chest in front of each bed. Romy has a ton of stuffed animals and I think it would be super cute to throw them in a low basket for everyone to see.

So many options! I'll be incorporating a little something from each of these inspiration photos. Here's the preliminary plan:

  • Two separate storage units on either side of the kids' bed. Low enough that I can add art and other decorative items above it.
  • Some kind of low shelf, or chest, in front of the bed, maybe even add a basket in front of the other bed.
  • Add some shelves, either floating, or not.
  • Decorative items to consider: map, chalkboard paint and a banner.

Well, I am off to closet land! We are so close to finishing out custom built-in hall closet! Share pictures soon!